Dreamweaver Site: Website Set-up
Setting up your website in Dreamweaver
Once you have sliced and exported the images from the web page design using Fireworks, you need to move on to the Dreamweaver software to build your website.
As part of our free CSS website design guide this tutorial now continues with the next step in creating the smart website shown on the left. Learn how to set-up your website in Dreamweaver - this is the first step in building your designed and exported website with Dreamweaver.
You Are Here ::: Home >> Free Tutorials >> Website Design with Dreamweaver & Fireworks >> Website Layout Design
Step 4: Setting up your website in Dreamweaver
So far you have completed the web design process up to slicing and exporting the website design using Fireworks. Once you have completed your website design, you need to setup your website in Dreamweaver to start the website building process.
Please follow the below steps to setup your website in Dreamweaver:
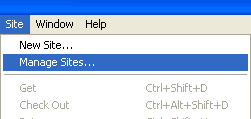
- Inside Dreamweaver open the Manage Sites pop-up window by clicking Site (Site >> Manage Sites). The Site menu is shown below:
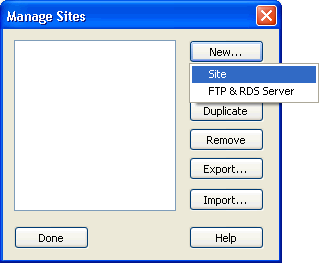
- In the Manage Sites dialog box, you can create, edit, duplicate, remove, export, and import Dreamweaver site definitions. To define a new site, click the New button in the Manage Sites pop-up window and choose Site. The image below shows the Manage Sites dialog box:
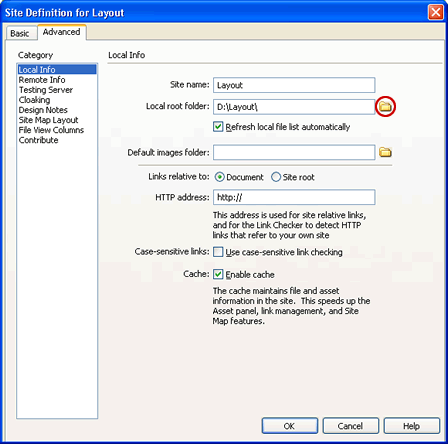
- Click the Advanced tab in your Site Definition for Layout window that pops up. Here you need to type your Site name and click on the folder icon in the right side of Local root folder to locate your local website directory (inside which you have the images folder to which you exported the image slices from Fireworks). The "Site Definition for Layout window" is shown below:
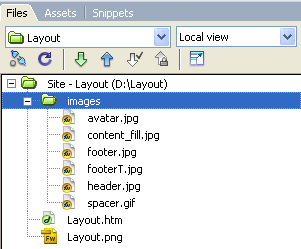
- After selecting the local root folder, click Ok. Now, All your Files will display in the Files Panel. The image below shows the Files panel in Dreamweaver:
Great! You have now completed the Dreamweaver site set-up tutorial. Now we move on to CSS and XHTML programming to build your website with Dreamweaver.
Back to: Slicing and exporting website images || Continue to Step 5: CSS and XHTML Website Programming
This CSS website design guide teaches layout design with Fireworks and CSS/XHTML website conversion with Dreamweaver. Learn CSS Web Design by following these simple steps:
- Introduction: How to make a Website
- Layout Design: Designing the website's layout with Fireworks
- Export Images: Slicing and Exporting the website images with Fireworks
- Dreamweaver Site: Setting up the website in Dreamweaver
- CSS Tutorial: CSS and XHTML website programming with Dreamweaver
- CSS Styles: Formatting the web pages using CSS style sheets in Dreamweaver
Software Required
Compatible Versions of Dreamweaver for this Tutorial
Note: The instructions in this tutorial are same across all Dreamweaver versions listed above; Screenshot images (if any) may differ. Adobe CS4+ users: Read the CS4+ version of this web design tutorial series - Design a Website. Recommended Version: Dreamweaver CS6


