Photo Collages
A photo editing effect helpful to create a photo collage or montage with Fireworks
In this tutorial you are going to learn how to fade images in different ways using Fireworks. Fade effects are often used for softening the edges of photos or for blending an image object into another image object. The image below shows how we have faded and collaged the image.

Prerequisite Knowledge
This tutorial teaches you how to use Fireworks fade image to create a photo collage or montage and thus assumes you are familiar with some design software, even if you are new to Adobe Fireworks. However be assured that our detailed instructions can be followed by even a total novice.
You Are Here ::: Home >> Free Tutorials >> Fireworks Tutorials >> Photo Montage, Fade Image EffectPhoto Montage, Fade Image Effect with Adobe Fireworks CS3 or below
You will learn how to fade your images in different ways such as elliptical, radial, horizontal, etc., Follow the steps given below:
-
Step 1: Open Fireworks, in the Properties inspector, select the Canvas color as blue.
- Step 2: Then, go to File >> Import (Ctrl+R) an image you would like to edit. Our example is shown below:
- Step 3: Now, you are going to apply fade effects to the imported image. Select the image using Pointer Tool
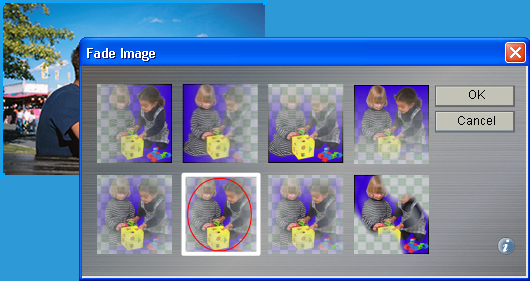
 and click on Commands >> Creative >> Fade Image. A Fade image pop-up window with eight pre-set fade effect will appear. The fade image window will look as below:
 - Step 4: Click on the faded image and adjust the handles appears on or near the object to have a fade effect. Once you fade the image, the image will appear as blur. Select the original image and edit the couple, so that the couple will appear separately.
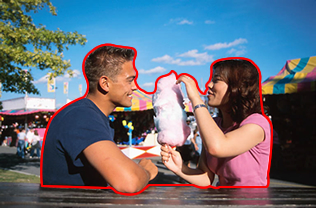
- Step 5: To edit the couple, click on the original image to apply feather effect. Feather the object using Convert Path to Marquee method by setting the edge as anti-alias (Click for the Image Feathering tutorial). For this you need to select/draw the particular object using Pen Tool
 . See the illustration below that will show how the couple is selected using the pen tool:
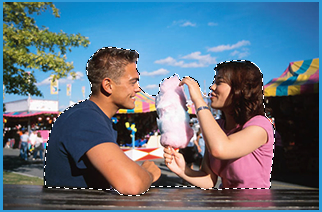
 - Step 6: Click on the path, then go to Modify >> Convert Path to Marquee and select the Edge as Anti-alias. Once you have drawn/selected the area, check if the selection is what you want deleted. If not, that is, the selected area is what you would like to keep, then right click the area, from the list select Modify Marquee >> Select Inverse (Ctrl+Shift+I). Now delete the selected area. The image will look as below:
- Step 7: Now place the feathered image above the faded image. See how we have placed the faded image in the header portion. (Click for the Professional Navigation tutorial)
- Using the fade image effect you can create a photo collage or montage. The image below shows how we have created a photo collage or montage:
- Again import two images that you would like to edit. Now you are going to apply fade effects to the imported image. Select the image using Pointer Tool
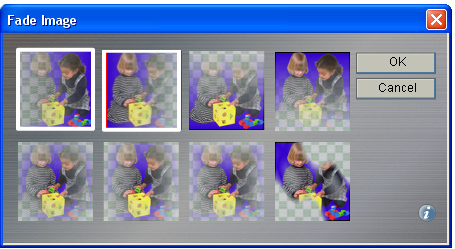
 and click on Commands >> Creative >> Fade Image. A Fade image pop-up window with eight pre-set fade effect will appear. In the above photo collage we have used two pre-set fade effects that are shown below:
 - Click on the faded image and adjust the handles appears on or near the object to have a fade effect.
Software Required
Adobe Fireworks (Macromedia Fireworks prior to version 8). Please check out the compatible versions listed in the box below. Since this tutorial covers an inbuild core function of fireworks to fade the image, using mostly any version above MX sholud be fine. If you are using the CS4 version please read Photo Montage, Fade Image Effect with Adobe Fireworks CS5
Compatible Versions of Adobe Fireworks for this Tutorial
Adobe Fireworks CS4 & above users: If you are using Fireworks CS4+ please note that some features, steps and screenshot images may differ for the above tutorial. Please read the CS4+ version of this free web design tutorial - Photo Montage, Fade Image Effect with Adobe Fireworks CS4+.
Recommended Version: Fireworks CS6


