Flash sends data to the Database
Flash form sends data to the database using ASP
Learn how to send data from your Flash interface into your database using ASP programming. This section is most probably the easiest of the whole Flash and ASP integration tutorial series. It is divided into three parts:
- Preparing the Flash form interface
- Getting the form sending data to the database to work
- Carrying out the insert operation through ASP
This involves the following functional cycle which needs to be realized:
- Flash sends the data from the 'Input Form' to the ASP file
- ASP sends the data to be stored to the database
- ASP sends the result of its operation (success or failure) to the Flash interface
- Flash sets a counter while the ASP inserts the data and shows success or failure of the operation
Note: Values or code you will have to enter are given in light blue and red Italics show specific settings to be followed by you. All ASP code can be directly cut and pasted into your file. Comments in ASP are in green.
Starting Flash Guest-Book Interface
Preparing the Flash Interface
- Open the GuestBook.fla Flash file. Go to the 'NewEntry'
frame i.e. the 'Input Form' in the level named 'guestbook'.
The following things need to be done for sending data from the
Flash form to the database:
- Name the text field boxes.
- Write action-scripts for the buttons i.e. Reset and Send and the frames.
- Make a counter to give the interface time to check if the data has been inserted into the database.
- Make frames to show success or failure of the operation.
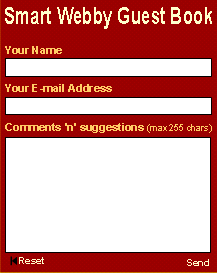
1. Input Form: You will have to assign variable names to the three fields shown by right clicking the respective boxes and selecting the properties option:
2. Making the Submit Counter Interfaces: Make the interface shown in Fig(b) on your right in the next frame after 'NewEntry'.
|
|
  |
|
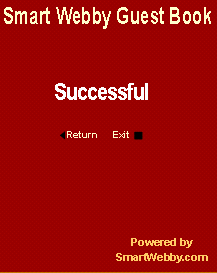
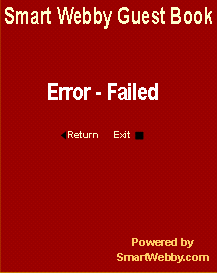
Fig(c & d): Successful and Failed Frames |
|
- Check List
- Make sure that you haven't missed out any fields or buttons in the forms above.
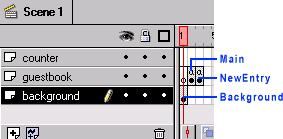
- Make sure that your Flash file Timeline'
looks like the one below. Layer 'guestbook' should have
the frames in the order (by their labels):
1. Main 2. NewEntry 3. Counter 4. Success 5. Failed
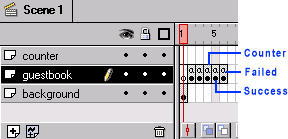
Getting the Flash form to work
Making the Counter Work : Carry out the following steps to accomplish this:
- Insert 2 frames after the 'Counter' frame and 7 frames after the 'Background' frame. This is done by using the 'Insert Frame (F5)' option shown when right clicking on a frame.
- Now right click the sixth frame of the 'counter' layer and select the 'Insert Blank Keyframe (F7)' option.
- Double click the same sixth frame and give the action script 'Go to and Play ("Counter")' [Do this by selecting the 'Go To' option, tick control: 'Go To and Play' and select the 'Counter' frame from the 'Label' drop down menu].
Now your Flash file should appear as shown below. You have now
finished the Flash interface for sending data to the database.
Export your file as 'guestbook.swf'
to an appropriate folder. Now create a new ASP file called 'GuestBook.asp'
and place the guestbook.swf file in it.
ASP Gets the Data from the Database
- Open your 'GuestBookSendCode.asp'
file. You will have to do the following steps to insert data
into the database.
- Connect to the Database
- Derive the variables and their values sent from Flash.
- Insert these values into the database.
- Send a operation successful response to Flash.
- Below is shown the code to accomplish these steps. Add it to the existing code in the file. You can cut and paste the code but it is good practice to understand what it does first.
Connecting to the Database and inserting data into it through ASP
<% '---------------This file is the GuestBookSendCode.asp file-------------------------
'Start Declaring all variable
used by you (you can do this as you code)
Dim DBConn, strDB, strDate,strInsertSQL,
strName, strEmail, strMess
'Give the Database Connection
String
strDB = "DRIVER={Microsoft Access
Driver (*.mdb)};DBQ=" & Server.MapPath("dbGuestbook.mdb")
& ";DefaultDir=" & Server.MapPath(".") & ";DriverId=25;FIL=MS
Access;MaxBufferSize=512;PageTimeout=5"
'Get today's Date and the data
sent from Flash (Replace is used to
replace a ' with
'' (2 quotes together)
because a database doesn't allow insertion of strings
with a single '
)
strDate=CDate(Date)
strName=Replace(request("name"), "'", "''")
strEmail=Replace(request("email"),"'", "''")
strMess=Replace(request("mess"), "'", "''")
'Give the SQL Insert Statement
strInsertSQL="Insert Into tblGuestBook
(fldDate,fldName,fldEmail,fldMessage) Values ('"
& strDate & "','"
& strName & "','"
& strEmail & "',' " & strMess & "' )"
'Open the database and insert
if strName<>"" and strEmail<>"" then
Set DBConn = Server.CreateObject("ADODB.Connection")
DBConn.Open strDB
DBConn.execute
strInsertSQL
response.write "iSuccess=1" 'Send
a success response to Flash
Else
response.write
"iFailed=1" 'Send
a failed response coz' the name or/and email field
was null.
End If
'Close the database connection
DBConn.close
Set DBConn=Nothing
%>
- Now insert the flash interface (GuestBook.swf file) in a new
page of your site and save the page as GuestBook.asp.
View the file on your site and check if the form displays 'Successful'
when you send some data. If yes then congratulations you have
successfully sent data from Flash to the Database.
- If the form displays failure then check if your GuestBookSendCode.asp
is connecting to your database by running it in the browser
by giving the URL query string as:
{site}/guestbook_folder_URL/GuestBookSendCode.asp?name=test&email=test@test.com&mess=Test
If you get a message 'iSuccess=1' then only is your GuestBook functioning properly.
Continue to Step 5A: Getting Data from the database to display in Flash
This tutorial covers the usage of ASP and Flash to bring about Flash dynamic data display and manipulation i.e. interactivity into Flash:
- Flash and ASP Introduction
- Basics of Flash and ASP
- Preparing the Stage
- Sending Data from your Flash form to the database
- Getting Data from the database into your Flash form
- Flash preloader that waits for the data to load
- Validation of fields in Flash forms using JScript and VBScript
