Site Navigation Design
Website navigation design ideas and step-by-step tutorial with Fireworks CS4+
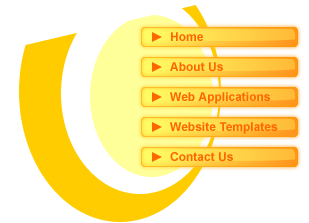
In this tutorial you are going to learn simple website navigation using basic techniques and predefined styles in Adobe Fireworks CS4+. Using predefined styles you can easily create pleasant gradient effects for navigation. The image below shows how we have created the following simple navigations bars.

Horizontal box navigation using solid colors
![]()
Horizontal bar navigation using inbuilt styles

Vertical buttons navigation using inbuilt button

Simple tabbed navigation using graphics from inbuilt button

Simple tabbbed navigation using inbuilt Fireworks CS4+ styles

Vertical buttons navigation using inbuilt Fireworks CS4+ styles
Prerequisite Knowledge
This tutorial teaches you how to create simple navigation bars using Fireworks and thus assumes you are familiar with some design software, even if you are new to Adobe Fireworks. However be assured that our detailed instructions can be followed by even a total novice.
You Are Here ::: Home >> Free Tutorials >> Adobe Fireworks Tutorials >> Adobe Fireworks Website Navigation Design for BeginnersNavigation Design Ideas for Beginners with Adobe Fireworks
Open Fireworks and create your base design over which you are going to place the navigational bar. Or you can first create the navigational elements and then design around it.
How to apply styles
- Step 1: Create any object (as you like). We have used Rectangle and Rounded Rectangle.
- Step 2: To apply the styles, Click on the object and go to Window > Styles to open the styles panel. Now select the Pointer Tool and select any style as you like.
- Step 3:
If you want to divide the navigation use Pen tool
 and draw a line. Select the line using Pointer Tool
  and apply Drop Shadow (for some navigation you might not need to apply drop shadow).
 - Step 4: On the right side of the properties window, you will find filters, click over the + symbol and choose Drop Shadow from Shadow and Glow. Click on the tiny blue circle with "i" next to the Drop Shadow filter (Edit and arrange live filters button) and set the following values for the filter: Opacity – 65%, Softness – 2, Angle – 270, Distance – 3, Color - #000000 (you can change the values according to the shadow). The color may vary according to your navigation. Our examples are listed below:
Horizontal box navigation using solid colors
- The above example shows how we have created the header portion using simple navigation (Click for the Fade Image tutorial). Draw a rectangle using Rectangle tool
 set the Fill Color as #EB82AB and Stroke Color as none. Now divide the rectangle using Pen Tool
  set the stroke color as #003466 and fill color as none. Note: Make sure that the Stroke category is Pixel hard (Pencil>>1-Pixel Hard).

Horizontal bar navigation using inbuilt styles
![]()
- In the above example we used Style 43
 and using Pen Tool
  we have divided the Rounded Rectangle and then we have applied drop shadow. Click on the tiny blue circle with "i" next to the Drop Shadow filter (Edit and arrange live filters button) and set the following values for the filter: Opacity – 65%, Softness – 2, Angle – 270, Distance – 3, Color - #FF9900. Draw two rectangles set the Fill color as #CC0000 and #FF9900. Now place the Rounded Rectangle in the rectangles. The predefined Styles are related with a number.
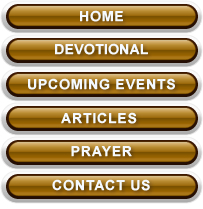
Vertical buttons navigation using inbuilt button
- Fireworks has symbol libraries in the Edit >> Libraries submenu from which you can import Animation symbols, Graphic symbols, Button symbols, Halo Lite, Navigation bars and Themes. Using these symbols, you can quickly create a web page containing advanced navigation bars.
- Go to Edit >> Libraries and select a buttons symbol. The buttons has collection of 2-, 3-, and 4-state Fireworks button symbols. To import button symbols into a document’s Library panel, select the Fireworks button symbols and click Import. Now the imported symbols appear in the Library panel. We have selected 2-State Button symbol. See the image below that will show how the imported 2-State Button symbol will appear:

- Click on the button symbol to edit the button. You can edit a button slice only in the Active Area tab of the Button Editor. Now double-click the button instance in the workspace, click the Active Area tab and change the width as 167 pixels and height as 30 pixels. After making the changes to the button click Done.
- To edit the text, click on the button symbol and change the text in the Properties Inspector. The image will look as below:

- Arrange the button symbols and change the text as shown below: Now you have quickly created a simple navigation using button symbols.

Simple tabbed navigation using graphics from inbuilt button
- Now you are going to create another simple navigation using Fireworks. Go to Edit >> Libraries and select a buttons symbol. To import button symbols into a document’s Library panel, select the Fireworks button symbols and click Import. Now the imported symbols appear in the Library panel. We have selected 2-State Button symbol. See the image below that will show how the imported 2-State Button symbol will appear:

- Double-click the button instance in the workspace, copy the button graphic in the Over tab then close the 2-State Button window and paste the button graphic in the workspace. Now the button will be in editable format, so that you can change the colors using Pointer Tool
 .
. - Select the button using pointer tool and change the Fill Color as #006699 and #003366. See the image below that will show how we have changed the colors:

- To edit the text, click on the text and change the text in the Properties Inspector. Select the text; choose font size - 11, color - #000033, Anti-aliasing level - Strong Anti-Alias.
- Duplicate the first tab and create three more tabs next to it with Fill Color as #99C2D6 and #006699. Click on the text and change the text in the Properties Inspector. Select the text; choose font size - 11, color - #006699, Anti-aliasing level - Strong Anti-Alias. Now arrange the four tabs as shown below:

- Use the above navigation idea in a regular website design or use it display tebbed content as in the example below:


- Step 1: Open Adobe Fireworks CS4+ and create a new document of size 800x800 pixels.
- Step 2: Create any object (as you like). We have used Rectangle and Rounded Rectangle.
- Step 3:
To apply the styles, Click on the object and go to Window > Styles to open the styles panel. Now select the Pointer Tool
 and select any style as you like. Our examples are listed below:
 - In the above example we used Plastic 004
 and Plastic 023
  for rollovers. Select Rounded Rectangle tool
  , create two rounded rectangle and apply the styles.
 - In the above example we used Plastic 056
 , Plastic 065
  , Plastic 066
  and Tool tips 028
  . Select the Rectangle Tool
  and create six rectangles and then apply the styles.
How to create simple navigation bars with Adobe Fireworks CS4+
In this web design tutorial series you are going to learn how to create simple navigation bars using predefined styles in Adobe Fireworks CS4+. Using predefined styles you can easily create pleasant gradient effects for navigation and header. The predefined Styles are related with a number. The image below shows how we have created header portion using simple navigations bars.

How to apply styles

![]()
Simple tabbbed navigation using inbuilt Fireworks CS4+ styles

- In the above example we used Dark Chrome 004
 , 010
, 010  and 017
  . Select the Rectangle Tool
  and create six rectangles and then apply the styles.
 - Use the above navigation idea in a regular website design.

Vertical buttons navigation using inbuilt Fireworks CS4+ styles

- In the above example we used Plastic 095
 .
Select the rounded rectangle tool and draw a rounded rectangle set the Stroke color as #EBEBEB and Fill color as #999999.
 - Select the Rounded rectangle and choose the following option:
- Select the Fill color go to Fill category >> select Gradient >> Choose Linear option
- Now click the gradient color, and then click on the small color rectangle that is on the left side and set its color to #FAFAFA.
- After that, click on the small color rectangle that is on the right side and set its color to #CCCCCC
- Now add another one rectangle by clicking the ‘+’
 symbol in between the two small color rectangle and make the colors as #999999. See the illustration below that will show how to set the colors:

- Draw another rounded rectangle over the previous rounded rectangle set the Stroke color as none and Fill Color as #240E03. The image below shows how we have placed the rounded rectangle.

- Again draw another rounded rectangle over the previous rounded rectangle. Click on the rounded rectangle and select Plastic 095 from Plastic Styles. See the illustration below that will show how we have applied the styles.

- Click the text tool
 , choose Font – Trbuchet Ms, Font Size - 14, Color - #FFFFFF Anti-aliasing level - Smooth Anti-Alias and write any text (as you like). The final button will look as below:

Related Tutorials: Drop Down menu | Advanced Navigation Ideas
Software Required
Adobe Fireworks CS4+. If you are using the CS3 and below version please read Navigation Design Ideas for Beginners.
Compatible Versions of Adobe Fireworks for this Tutorial
Adobe Fireworks CS3 & below users: For lower versions of Fireworks, some features, steps and screenshot images may differ. Please read the CS3 & Below version of this free web design tutorial - Navigation Design Ideas for Beginners.
Recommended Version: Fireworks CS6